Moving a WordPress site with a few dozen pages is easy. Moving one with 20,000 posts, 15 years of comments, and a media library the size of a small hard drive is a different animal entirely. One timeout, one truncated export, one missed table, and you've got broken posts, missing images, or a database that silently drops content nobody notices until a customer complains three weeks later.
If you're planning a WordPress migration service for a large site, the usual advice (export, import, done) just doesn't cut it. Here's how to actually do it without anything going missing.
Why Large WordPress Sites Break During Migration
Most migration failures on big sites come down to the same handful of causes:
- PHP execution limits timing out mid-export or mid-import
- Database tables that exceed what phpMyAdmin or basic export tools can handle reliably
- Serialized data (widget settings, some plugin options) getting corrupted by a simple find-and-replace on the URL
- Media files that live outside the standard uploads folder structure, especially after years of plugin changes
- Orphaned post meta or revisions that bloat the database and slow the whole process down
None of these are exotic problems. They just show up more often, and hurt more, when you're dealing with thousands of posts instead of dozens.
Step 1: Clean Up Before You Move Anything
This is the step almost everyone skips, and it's the one that saves the most headaches.
- Delete old post revisions. A site with years of edits can easily have more revision rows than actual posts.
- Empty the trash for posts, pages, and media.
- Remove spam comments and unapproved comments you don't need.
- Check for orphaned postmeta entries left behind by plugins you no longer use.
We've written before about database cleanup for WordPress, and it applies directly here. A smaller, cleaner database exports faster, imports faster, and is far less likely to hit a timeout partway through.
Step 2: Back Up Everything Before You Touch a Thing
Before any migration, you need a complete backup of both files and database, not just an export of the posts table. Treat this backup as your safety net: if anything goes wrong mid-migration, you want to be able to restore the original site exactly as it was.
We run automatic backups on every server, so you can always restore from a known-good point. For a migration, it's smart to also create a fresh manual backup right before you start, so you have a precise snapshot of the state you're migrating from. See how backup and restore works if you want the details.
Step 3: Don't Rely on a Single Export File for Thousands of Posts
The WordPress built-in exporter (Tools > Export) works fine for small sites. For a large one, it often chokes, times out, or produces an XML file so big that re-importing it becomes its own project.
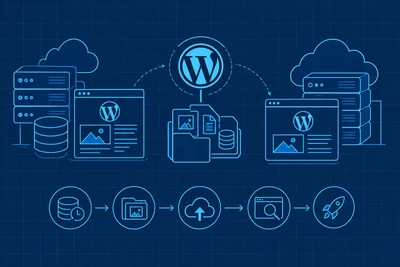
For bigger migrations, a direct database migration is usually more reliable than the WXR export/import route:
- Export the database directly via SSH using mysqldump, which handles large tables far better than browser-based tools.
- Transfer the compressed database file to the new server.
- Import it directly on the new server, again via command line, rather than through a web interface.
- Separately, sync the wp-content/uploads folder (and any other custom content directories) using rsync or a similar tool so large media libraries transfer without timing out.
If your current host gives you SSH access, this whole process is far less painful than wrestling with upload limits in a browser.
Handling the URL Change Safely
Once the database lands on the new server, you need to update the site URL everywhere it's referenced, including inside serialized arrays used by widgets, theme settings, and some plugins. A plain find-and-replace will corrupt any serialized data it touches, because serialized strings include the exact character count of the text they contain. Change the text length without updating that count, and WordPress can't read the data anymore.
Use a search-and-replace tool built specifically for WordPress databases, one that understands serialized data and updates those counts automatically. This matters even more on large sites, where a single corrupted options row can take down the whole admin dashboard.
Step 4: Verify Before You Point DNS
Before you switch anything live, check the migrated site thoroughly on its temporary URL or staging environment:
- Confirm the total post count matches the original site exactly
- Spot-check posts from different years, not just recent ones
- Check that featured images and inline images are loading, especially on older posts
- Test comments are intact and threaded correctly
- Verify category and tag archives are showing the right post counts
- Check custom post types (products, portfolio items, events) separately, since they're easy to overlook
A staging environment is genuinely useful here. You can run the full verification process without any risk to the live site, and only cut over once everything checks out.
Step 5: Handle Redirects and SEO Before Going Live
With thousands of posts, even small URL structure changes can affect a huge number of indexed pages. If your permalink structure is staying the same, this is less of a concern. But if anything about the URL pattern changes, you'll need a redirect map, not just a blanket redirect to the homepage.
This is a big enough topic on its own. If you want the full picture, we covered it in how a professional WordPress migration service protects your SEO during a host switch.
Step 6: Monitor Closely After Cutover
Once DNS has propagated and the new server is live, keep an eye on things for the first 48 to 72 hours. Watch for 404 errors in your analytics, check server error logs, and make sure uptime monitoring is in place so you catch any issue the moment it happens rather than hearing about it from a visitor. Uptime monitoring is worth having running before you even start the migration, so you have a clear before-and-after picture.
The Takeaway
Migrating a large WordPress site comes down to patience and verification, not shortcuts. Clean the database first, back up everything, move the database and files separately through the command line rather than a browser upload form, use a serialization-safe search and replace, and verify thoroughly before you cut over. Thousands of posts is a lot of content to lose. Treat the migration with the care that content deserves, and nothing has to go missing.