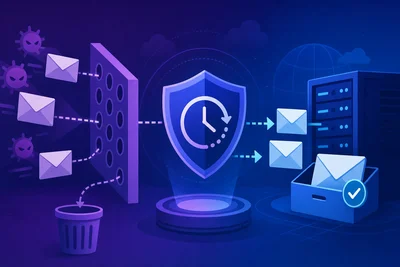
If you've ever sent an important email that mysteriously ended up in someone's spam folder, there's a good chance your domain is missing a few DNS records that email providers use to decide whether to trust you. A proper DKIM SPF DMARC setup is the single biggest thing you can do to improve how Gmail, Outlook, and every other inbox provider treats your messages.
None of this requires you to be a network engineer. It's a handful of DNS entries, and once they're in place, you mostly forget about them. Let's walk through what each piece does and how to actually set it up.
Why DKIM SPF DMARC Setup Matters So Much Right Now
Email providers have gotten aggressive about filtering spam and phishing. Google and Yahoo now require bulk senders to have these records in place, and even if you're not sending bulk email, missing records make your domain look suspicious. A spammer can send email that claims to be from your domain unless you tell the world exactly which servers are allowed to send on your behalf. That's the whole point of this setup.
Think of it as showing ID at the door. Without it, inbox providers have no way to confirm the email claiming to be from you actually came from you.
SPF: Telling the World Who Can Send for You
SPF stands for Sender Policy Framework. It's a simple DNS text record that lists the mail servers allowed to send email using your domain name. When an email arrives, the receiving server checks the sending IP against your SPF record. If it doesn't match, that's a red flag.
A basic SPF record looks something like this:
v=spf1 include:_spf.yourmailprovider.com ~all
The include part points to your email provider's servers. The ~all at the end tells receivers to treat anything else as suspicious but not necessarily reject it outright. You can only have one SPF record per domain, so if you use multiple sending services (your main email, a marketing tool, a CRM), they all need to go into the same record.
DKIM: Proving the Email Wasn't Tampered With
DKIM, or DomainKeys Identified Mail, works differently. Instead of listing allowed servers, it adds a digital signature to every email you send. This signature is created using a private key on the sending server, and the receiving server checks it against a public key published in your DNS.
If even a single character of the email changes in transit, the signature breaks and the receiving server knows something's off. Setting up DKIM usually means grabbing a public key from your email provider's dashboard and adding it as a TXT record, often under a selector like default._domainkey.yourdomain.com.
DMARC: The Policy That Ties It Together
DMARC, or Domain-based Message Authentication, Reporting and Conformance, is where SPF and DKIM actually become useful. It tells receiving servers what to do when a message fails those checks, and it gives you visibility into who's sending email using your domain.
A starting DMARC record often looks like this:
v=DMARC1; p=none; rua=mailto:dmarc-reports@yourdomain.com
Starting with p=none is smart. It tells receivers to just report failures without rejecting anything, so you can watch the reports for a few weeks and make sure you haven't missed a legitimate sending source. Once you're confident everything's covered, you move to p=quarantine and eventually p=reject, which tells inbox providers to actively block spoofed mail claiming to be from you.
Step-by-Step: Putting It All Together
- Log into your DNS management panel, wherever your domain's records live.
- Add your SPF TXT record, combining all legitimate sending sources into one entry.
- Grab your DKIM public key from your email provider and add it as a TXT record under the correct selector.
- Add a DMARC TXT record starting with p=none so you can monitor without disrupting mail flow.
- Check the DMARC reports for a couple of weeks, fix anything that's failing, then tighten the policy to quarantine or reject.
If you're not sure where your DNS is managed, check with whoever set up your domain or review how DNS management works before making changes. A typo in these records can block legitimate email, so it's worth double-checking each entry before you save it.
Common Mistakes That Break the Setup
The most frequent issue we see is multiple SPF records on the same domain. DNS only recognizes one, so if you have two, both might get ignored. Another common mistake is forgetting to update SPF when you add a new email tool, like a newsletter platform or a CRM that sends on your behalf. That tool's messages will fail SPF checks until you add it to the record.
People also jump straight to p=reject on DMARC without monitoring first. That can silently block your own legitimate email if you missed a sending source. Patience during the monitoring phase saves a lot of headaches later.
Where Hosting Fits Into Email Authentication
If your website and email run through the same hosting setup, good DNS management makes this whole process a lot smoother, since all your records live in one place and changes propagate predictably. We've seen plenty of cases where business email hosting providers handle the DKIM signing automatically, so the only thing left for you to do is add the DNS records they generate. For a deeper look at how mailbox setup and deliverability connect, see our business email hosting overview.
We also covered the related reputation side of this in How Sender Reputation Works and Why It Is the Foundation of Email Deliverability, and if you want to dig into why messages land in spam even with good intentions, check out Why Your Emails Land in Spam and What Email Deliverability Actually Means.
The Takeaway
A complete DKIM SPF DMARC setup isn't a one-afternoon project you do and forget entirely, but it's close. Add the records, monitor the reports, tighten the policy, and you'll see fewer legitimate emails landing in spam and far less risk of someone spoofing your domain. If you manage multiple sending tools, just remember to revisit these records every time you add a new one. That small habit keeps your whole setup accurate for the long run.